Focus and precision are required when installing rubber compensators, also known as expansion joints or bellows, correctly;
they’re vulnerable pieces but when mounted correctly,
there is little that can go wrong. We have assembled the best tips
for using these compensators and complex situations that may occur.
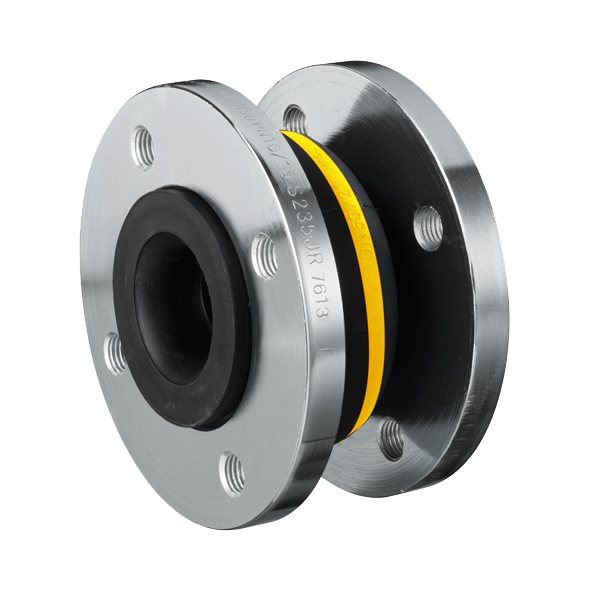
Assortment rubber compensators
Discover the assortment of rubber compensators on the ERIKS webshop and find the right product for your application.
View the assortment
Tip 1: Store rubber compensators in a dry and cool place
ERIKS rubber compensators, or expansion joints, need to be stored in a dry and cool place, which will prevent the rubber from prematurely wearing out.
Place the compensators with the mating flange, or joint attachment, face down on a flat foundation as to not damage or distort the gasket surface.
The bellows may not be damaged as you unpack the rubber compensators.
Do not place heavy objects on top of the rubber compensators when they are in storage.
Tip 2: Check whether the bellows are suitable for your application
Check whether the bellows can be used for your application (chemical resistance, pressure and temperature).
Then check whether the movement requirements can be safely absorbed by your compensator.
The pipes must also be properly aligned before installing the rubber compensator.
Generally, a 3mm misalignment is allowed.
Expansion joints should not be used to rectify misalignment of anything more than that.
The gasket surfaces of the companion flanges have to be free of irregularities.
No paint or lubricant may be used on the bellows.

Tip 3: Watch out for complications that may occur when exerting pressure
Every compensator exerts pressure on the piping or joints that can be especially great
as a result of different causes that usually occur simultaneously:
- • Check whether there are enough anchor points to absorb the forces of the compensator.
The compensator will exert an axial pressure on anchor points
because of the internal pressure and the bellows’ surface.
- • Due to the spring stiffness and movement of the compensator, the axial pressure is exerted on the anchor points of the machine.

- Due to the friction force between the guides, forces will be transmitted to the anchors.
These forces are dependent on the number of guides.
- Pipelines should be independently supported and guided using suspension brackets, supports and guides.

- Do not put the weight of the pipeline on the compensator.
- Compensators should be placed as close to the anchor points as possible.
When you choose not to make use of anchor points,
you should place movement limiters that can absorb the reactional forces of the compensator.
When the forces are not absorbed correctly,
this could lead to the tearing of the bellows or a pipeline fracture.
Tip 4: Pay extra close attention to mounting flanged connections
- The entire width of the sealing surface of the compensator should be placed against the counter flange.
- The counter flange should always be a welding-neck type.
- No gaskets are required during mounting. The collared rubber serves as a seal.
- The sealing surface of an enlarged internal pipe diameter, like a slip-on flange or a threaded flange,
should always be brought back to the right size through an extra ring.
A gasket ring should therefore be placed between the ring and the counter flange.
- Not using the right counter flange will damage the sealing surface of the bellows. This will cause the accelerated failure of the compensator.
Correctly mount the bolts
Compensators that have threaded holes in their flanges (compensator Model 49) can only
exclusively be mounted with the bolts and washers that come with the compensator.
Bolts that are too long will damage the rubber bellows at maximum compression
due to the high corrugation of this compensator.
With other types of compensators that have clearance holes,
the bolt head should be placed against the underlying compensator flange (on the bellows side of the compensator).
Tighten the screws equally in a crosswise pattern with a torque wrench.
- Secure all bolts equally by hand (pay attention to the parallelism of the gasket surfaces)
- Tighten the bolts in a crosswise pattern of the required torque following the table below
- Increase the torque following the table below:
| DN |
step 1 |
step 2 |
| 20 - 80 |
50 Nm |
80 Nm |
| 100 - 300 |
50 Nm |
100 Nm |
| 350 - 500 |
50 Nm |
130 Nm |
| 600 |
100 Nm |
210 Nm |
| 700 |
100 Nm |
250 Nm |
| 750 |
100 Nm |
280 Nm |
| 800 |
100 Nm |
300 Nm |
| 900 |
100 Nm |
310 Nm |
| 1000 |
100 Nm |
340 Nm |
Half an hour following the first torque,
bolts should be tightened once more according to the prescribed torque.
At a sealing pressure of 25 with compensator model 49, the torque should be increased by 30 percent.
Tip 6: Place a cover during installation underground
When compensators are installed underground, a soil resistant cover should be placed so that the compensator can move freely.
Tip 7: Do not isolate!
ERIKS advises against insulating a compensator because the maximum temperature of rubber bellows
could be exceeded and would limit the movement of the compensator.
If insulation must be placed, make sure that this can be removed so that periodic check-ups of the bolts
and access to the flanges can be granted.


